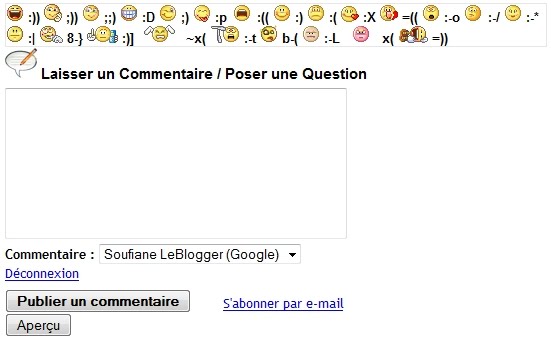
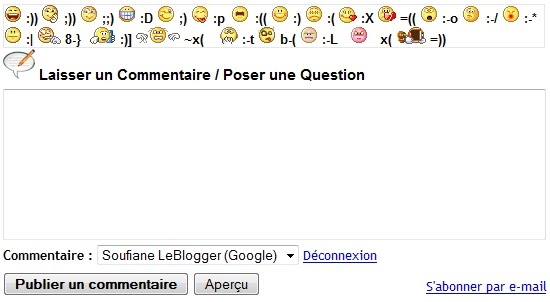
To open a text link or image in a new window / tab, simply add to <A> that contains the destination URL attribute: target="_blank" like this:

<a target="_blank" href="http://all-forblogger.blogspot.com/"> all info for blogger</a> 

To open an image in a new window / tab, the same procedure: we must add
target="_blank" the tag <a> 

<a target="_blank" href="http://all-forblogger.blogspot.com/"><img src="url-de-l'image"/></a> 

Open links in a widget in a new window / tab
Log in to Blogger, Go to "Layout", "Edit HTML", check "Developing models of gadgets" and look for a code like the following
:
(you'll find widgets with HTML instead of Linklist)

<b:widget id='LinkList' locked='false' title='The name of your Widget' type='LinkList'>
<b:includable id='main'>
<b:if cond='data:title'><h2><data:title/></h2></b:if>
 <div class='widget-content'>
   <ul>
     <b:loop values='data:links' var='link'>
       <li><a expr:href='data:link.target' target='_blank'><data:link.name/></a></li>
     </b:loop>
   </ul>
   <b:include name='quickedit'/>
 </div>
</b:includable>
</b:widget>  

Add target = "_bank" as shown in the code.
the Labels
To open the links in the widget "Labels" in a new window / tab, locate the following code:
 

expr:dir='data:blog.languageDirection' expr:href='data:label.url'

This code is duplicated, so add target='_blank' twice like this:

expr:dir='data:blog.languageDirection' expr:href='data:label.url' target='_blank' 


Today I'll show you how to display image with a summary of your articles in the homepage, archives, labels and research. All this will be done in a completely automated, that is to say that you will apply the trick and your articles (old and new) will be summarized without you having to change them.

Installation - Step 1:


Log in to Blogger, Go to "Presentation", "Edit HTML" select "To develop models of gadgets," and find (Ctrl + F) </ head> and just before copy / paste these lines:


<script type='text/javascript'>var thumbnail_mode = &quot;no-float&quot; ;
summary_noimg = 300;        /* Longueur des des résumés,article sans image */
summary_img = 250;           /* Longueur des des résumés, article avec image */
img_thumb_height = 128;       /* Hauteur de l’image dans le résumé */
img_thumb_width = 128;       /* Largeur de l’image en pixel */
</script>
<script src='http://lewordpress.com//Blogger/JS/LireLaSuite0.js' type='text/javascript'/>

To display the image on the right of the summary
Instead, use this code just before
</head&gt;

<script type='text/javascript'>var thumbnail_mode = &quot;no-float&quot; ;
summary_noimg = 300;        /* Longueur des des résumés,article sans image */
summary_img = 250;           /* Longueur des des résumés, article avec image */
img_thumb_height = 128;       /* Hauteur de l’image dans le résumé */
img_thumb_width = 128;       /* Largeur de l’image en pixel */
</script>
<script src='http://lewordpress.com//Blogger/JS/LireLaSuiteDroite0.js' type='text/javascript'/>

To center the image of the summary
To view the summary with the image in the center (size of the image, as shown in the article not abstract) and abstract text just below the image, copy / paste this code before
</head> :

<script type='text/javascript'>var thumbnail_mode = &quot;no-float&quot; ;
summary_noimg = 300;        /* Longueur des des résumés,article sans image */
summary_img = 250;     /* Longueur des des résumés, article avec image */
</script>
<script src='http://lewordpress.com//Blogger/JS/LireLaSuiteCentre0.js' type='text/javascript'/>


Installation - Step 2:

Now, look <data:post.body/> and replace it with these lines:

<b:if cond='data:blog.pageType == &quot;item&quot;'>
<data:post.body/>
<b:else/>
<b:if cond='data:blog.pageType == &quot;static_page&quot;'>
<data:post.body/>
<b:else/>
<div expr:id='&quot;summary&quot; +  data:post.id'>
<data:post.body/>
</div>
    <script type='text/javascript'>createSummaryAndThumb(&quot;summary<data:post.id/>&quot;);</script> <div style='clear: both;'/><span style='float:right;padding-top:20px;'><a expr:href='data:post.url' rel='bookmark'>Read more...
</a></span>
</b:if>
</b:if>

You can use an image instead of the expression Read more... replacing it with:

<img src="URL de votre image" title="Lire La Suite" alt="Read more...">
Now the messages in your homepage, archives, labels and research are summarized with an image and link more ...


Widget display only the pages you choose!

Once you add a widget in your blog, it'll be displayed in every page of it (the home page and each page of message).
But sometimes we want to display a widget, only the home page or only in the pages of messages or even a specific page of the blog.
The configuration of this trick is very simple, but requires that you literally every widget is a name well-Specific for you to find in the HTML code (once you have done this trick you can modify or delete his name ).

Log in to Blogger, Go to "Layout", "Edit HTML" select "To develop models of gadgets," and find (Ctrl + F) the following code:  

 <b: widget id you will find all widgets for your blog.
 
Now locate the widget you want to customize (for example Adsense, ...). Archive The code of your widget should look like this:


<b:widget id='HTML3' locked='false' title='THE NAME OF YOUR WIDGET' type='HTML'>
<b:includable id='main'>
<!-- only display title if it's non-empty -->
<b:if cond='data:title != ""'>
<h2 class='title'><data:title/></h2>
</b:if>
<div class='widget-content'>
<data:content/>
</div>
<b:include name='quickedit'/>
</b:includable>
</b:widget>


Once you have located the widget, the widget to display only the home page, add the two red line:
 
<b:widget id='HTML3' locked='false' title='THE NAME OF YOUR WIDGET' type='HTML'>
<b:includable id='main'>
<b:if cond='data:blog.url == data:blog.homepageUrl'>
<!-- only display title if it's non-empty -->
<b:if cond='data:title != ""'>
<h2 class='title'><data:title/></h2>
</b:if>
<div class='widget-content'>
<data:content/>
</div>


<b:include name='quickedit'/>
</b:if>
</b:includable>
</b:widget>

To display the widget on all pages of your blog, except the home page.
 
<b:widget id='HTML3' locked='false' title='LE_NOM_DE_VOTRE_WIDGET' type='HTML'>
<b:includable id='main'>
<b:if cond='data:blog.pageType == "item"'>
<!-- only display title if it's non-empty -->
<b:if cond='data:title != ""'>
<h2 class='title'><data:title/></h2>
</b:if>
<div class='widget-content'>
<data:content/>
</div>

<b:include name='quickedit'/>
</b:if>
</b:includable>
</b:widget>
To display the widget in a specific page and only this page of your blog.
 
<b:widget id='HTML3' locked='false' title='LE_NOM_DE_VOTRE_WIDGET' type='HTML'>
<b:includable id='main'>
<b:if cond='data:blog.url == "ENTRER_ICI_UNE_URL_DE_VOTRE_BLOG_http://..."'>
<!-- only display title if it's non-empty -->
<b:if cond='data:title != ""'>
<h2 class='title'><data:title/></h2>
</b:if>
<div class='widget-content'>
<data:content/>
</div>

<b:include name='quickedit'/>
</b:if>
</b:includable>
</b:widget>
 
That should add only the code in red. 

How do I change the size of the comment field?
Fastosh Sign up for Blogger, Go to "Layout", "Edit HTML" select "To develop models of gadgets." Locate the code below and change the setting in red to change the width of the feedback form


<iframe allowtransparency='true' class='blogger-iframe-colorize blogger-comment-from-post' frameborder='0' height='410' id='comment-editor' name='comment-editor' src='' width='100%'/>


(replace 100% the size of your center column, for example width = '500 ')


commentairecommentaire

Facebook, the first social network in the world, out yesterday five new buttons to share.

FacebookFacebookFacebookFacebook

Click the "Share" button next to the title of this paper to test the button.
 
To add a button to share your Facebook blog blogger Log in to Blogger, Go to "Layout", "Edit HTML" select "To develop models of gadgets" and locate the following code:

 <div class='post-header-line-1'/>

Just after this line, add the following code:
 Facebook
<div style="float:left;padding:5px;">
<a expr:share_url='data:post.url' name='fb_share' rel='nofollow' type='box_count'>Share</a> 
<script src='http://static.ak.fbcdn.net/connect.php/js/FB.Share' type='text/javascript'/></div>

Facebook

<div style="float:left;padding:5px;">
<a expr:share_url='data:post.url' name='fb_share' rel='nofollow' type='button_count'>Share</a> 
<script src='http://static.ak.fbcdn.net/connect.php/js/FB.Share' type='text/javascript'/></div>
Facebook


 <div style="float:left;padding:5px;">
<a expr:share_url='data:post.url' name='fb_share' rel='nofollow' type='button'>Share</a> 
<script src='http://static.ak.fbcdn.net/connect.php/js/FB.Share' type='text/javascript'/></div>
Facebook
<div style="float:left;padding:5px;">
<a expr:share_url='data:post.url' name='fb_share' rel='nofollow' type='icon_link'>Share</a> 
<script src='http://static.ak.fbcdn.net/connect.php/js/FB.Share' type='text/javascript'/></div>
Facebook


<div style="float:left;padding:5px;">
<a expr:share_url='data:post.url' name='fb_share' rel='nofollow' type='icon'>Share</a> 
<script src='http://static.ak.fbcdn.net/connect.php/js/FB.Share' type='text/javascript'/></div>


 You can change the term "Share" with what you want and change the place of the button: right or left.

Inscription à : Articles (Atom)